View and edit your automations
Table of Contents
After you have created your automations, you can easily view and edit them. If you don't have an automation, try creating one!
View automations
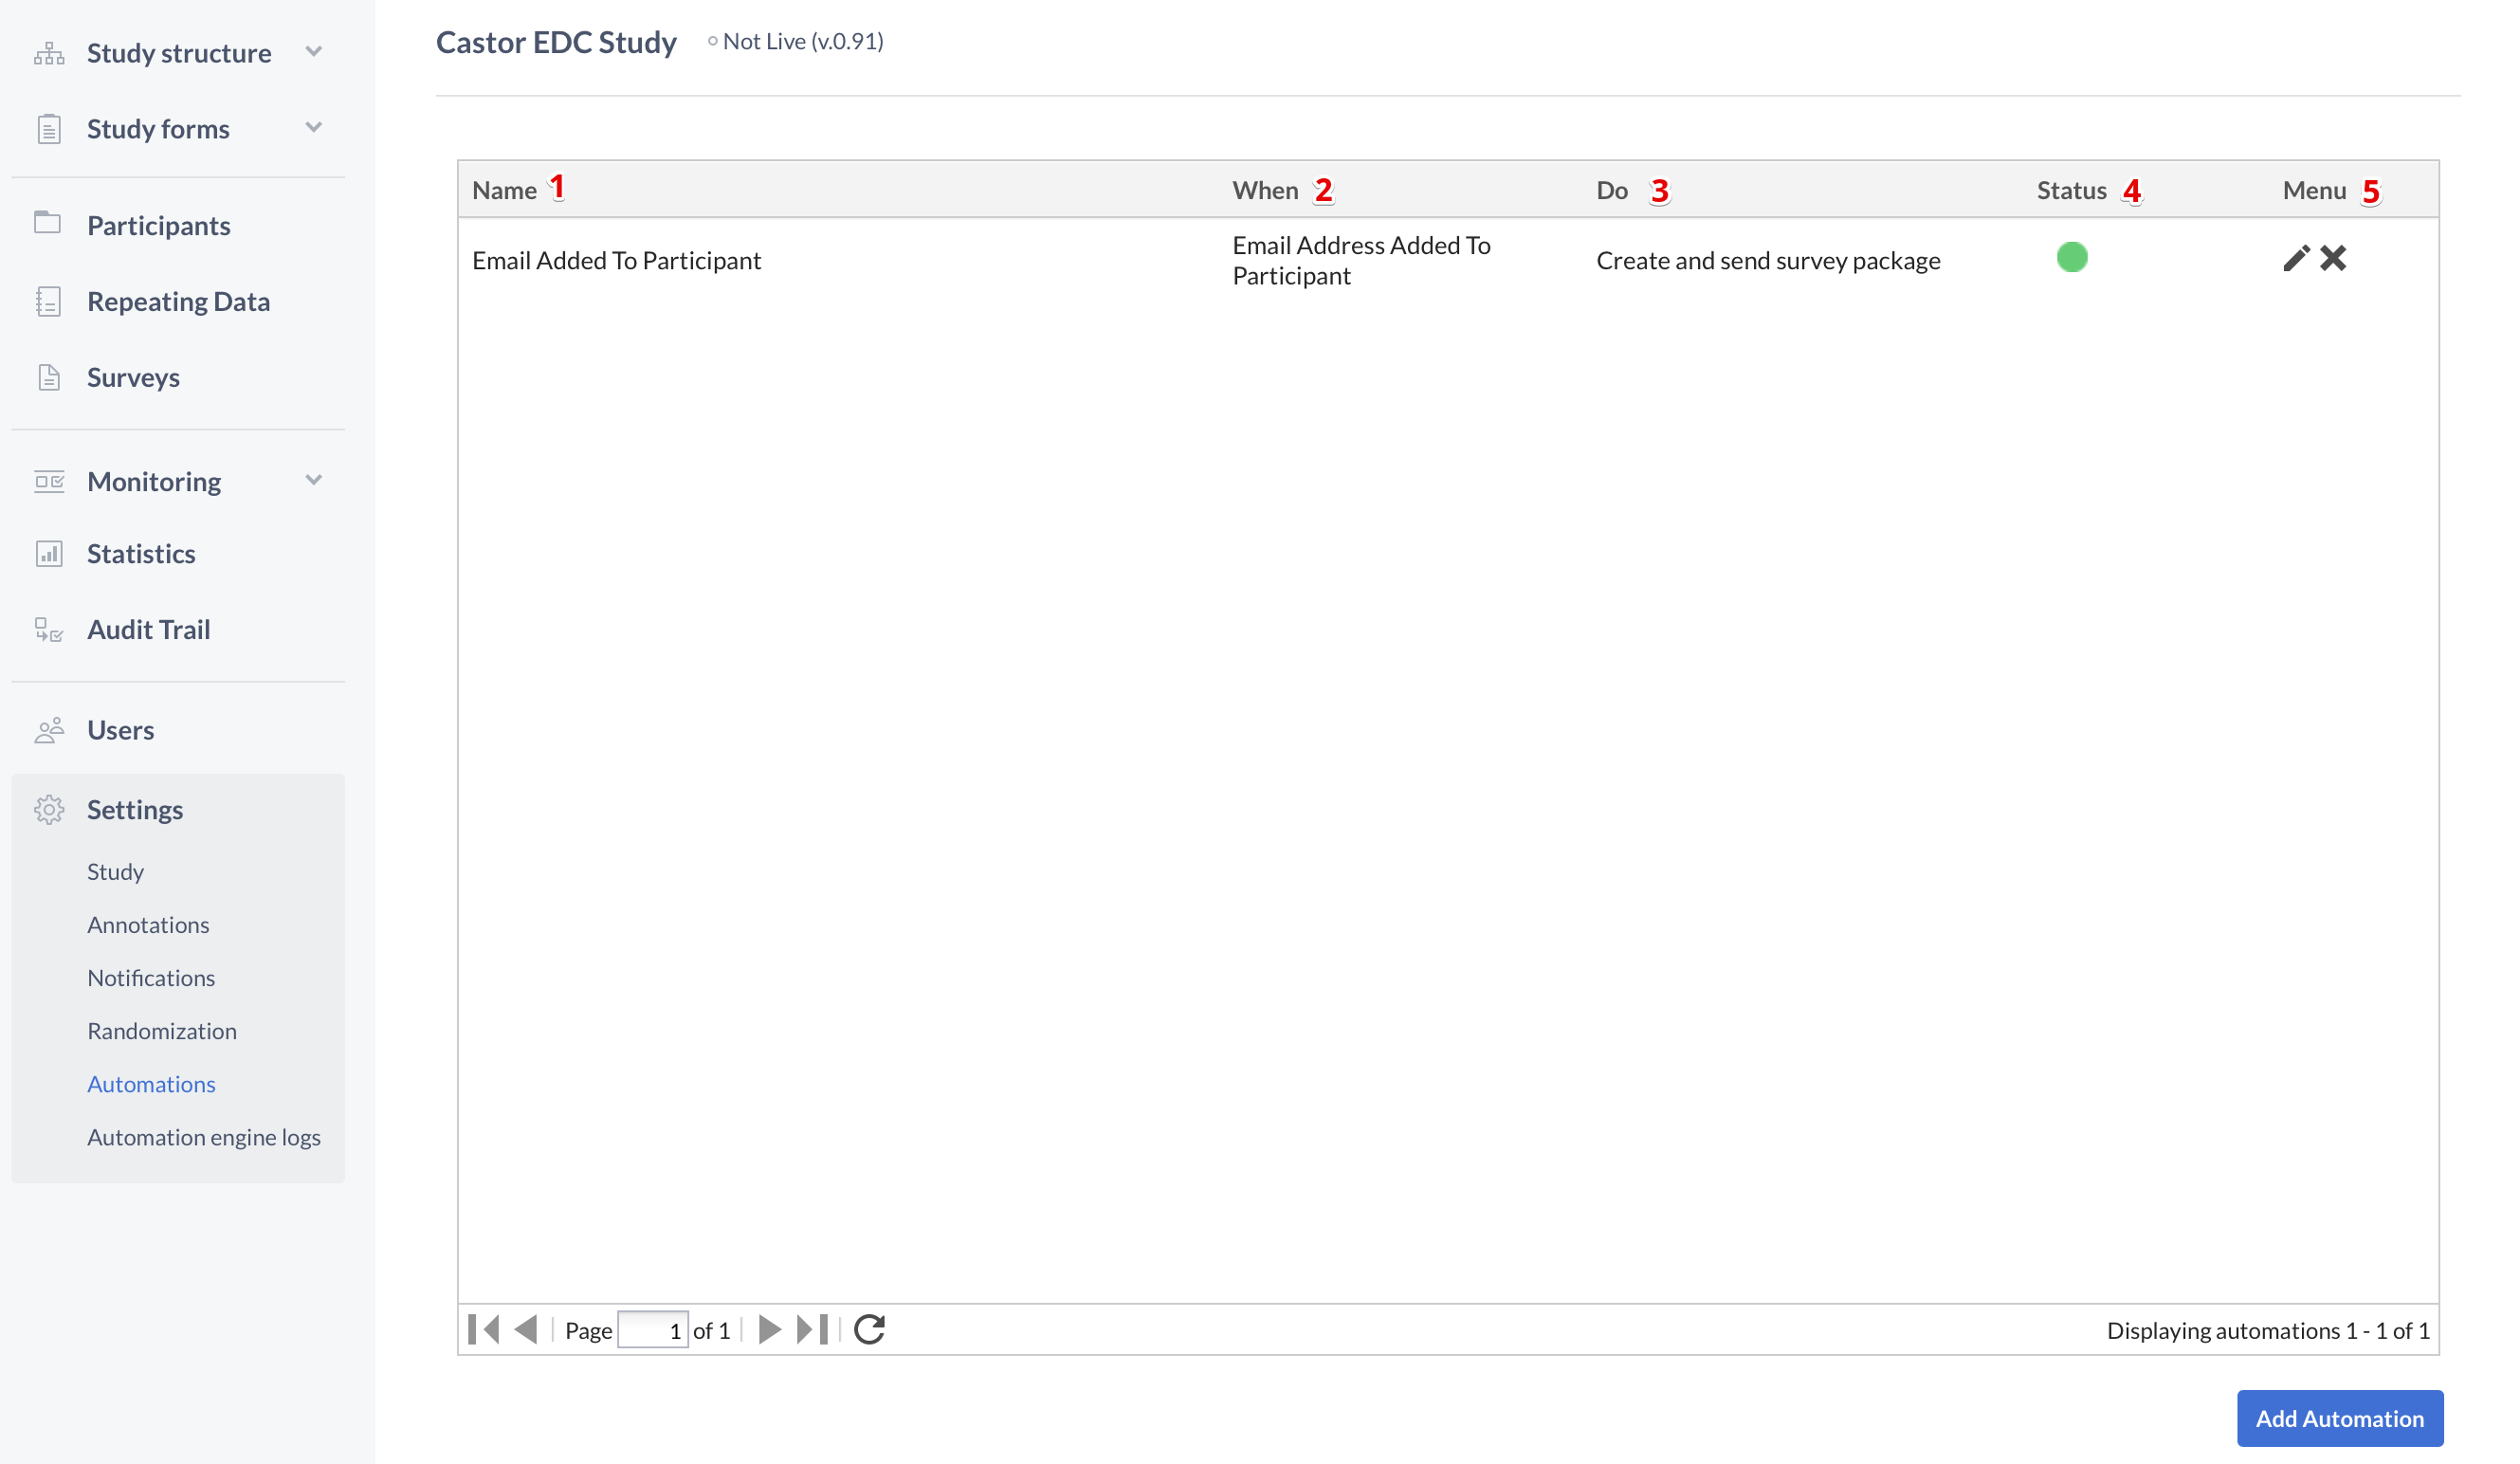
To view the list of all of your current automations, navigate to the Settings tab and then to the Automations sub-tab. See the screenshot below. If you have no automations in your study, the chart will be empty and will contain no automation data.

- Name: The name you gave your automation to easily identify it.
- When: The events that will tell the system to check if the condition(s) are satisfied in order to perform the action.
- Do: the action that will occur after the event triggers it.
- Status: indicates whether your automation is active of inactive. Green represents it is active, empty/white represents it is inactive. You can click on the circular icon to select the automation activity status.
- Menu: Edit or delete your automation. By clicking the pencil tool, you will re-enter the Automation Engine and can make edits. By clicking the "X" icon, you will delete your automation.
Edit your automation
Click on the pencil tool icon underneath the fifth column in the Automation Overview to enter the Automation Engine. The interface will look just like when you were building your automation, except the event, conditions and action will be pre-populated with your previous selections. Edit your automation by editing the title, the event, condition or action.
Continue the Automation Engine tutorial by testing your newly created automation(s).