Introduction to the Automation Engine
Table of Contents
The Automation Engine is a relatively new feature which users can use to automate many of their tasks. The Automation Engine is still a beta feature and thus to use it you need to have beta features enabled. You can do this by going to the Settings tab, then go to the Study sub-tab. In the section 'Other' you should select Enable beta features. To get started, here is a short explanation of the uses of the Automation Engine and some of its features.
When to use the Automation Engine
The Automation Engine allows you to create automations that will be executed throughout your study. By automating some of your tasks, you have the ability to avoid tedious manual actions or to customize your CRF for different populations. Overall, automations will greatly increase your efficiency. Use automations when a task must be repeatedly done when a certain event occurs.
Commonly used example automations are:
- Hide a visit in your CRF for certain subjects. For example, you want the visit 'Follow-up' to be hidden for subjects that don't require a follow-up, instead of it being visible in the CRF for all subjects.
- Send a survey to subjects once an email has been added to their participant. This can be to all subjects, or to subjects with a specific data point being entered, e.g. all male subjects. Also, it is possible to create and send a survey invitation based on a field value updated event. For example, schedule a survey for a patient as soon as the field "Is the patient pregnant?" is answered with "Yes".
- Create a query when a certain value limit is exceeded. For example, you want to add a query to the field BMI in case it exceeds a certain value.
Following are the main steps that are required for you to create your automations.
The basics of the Automation Engine
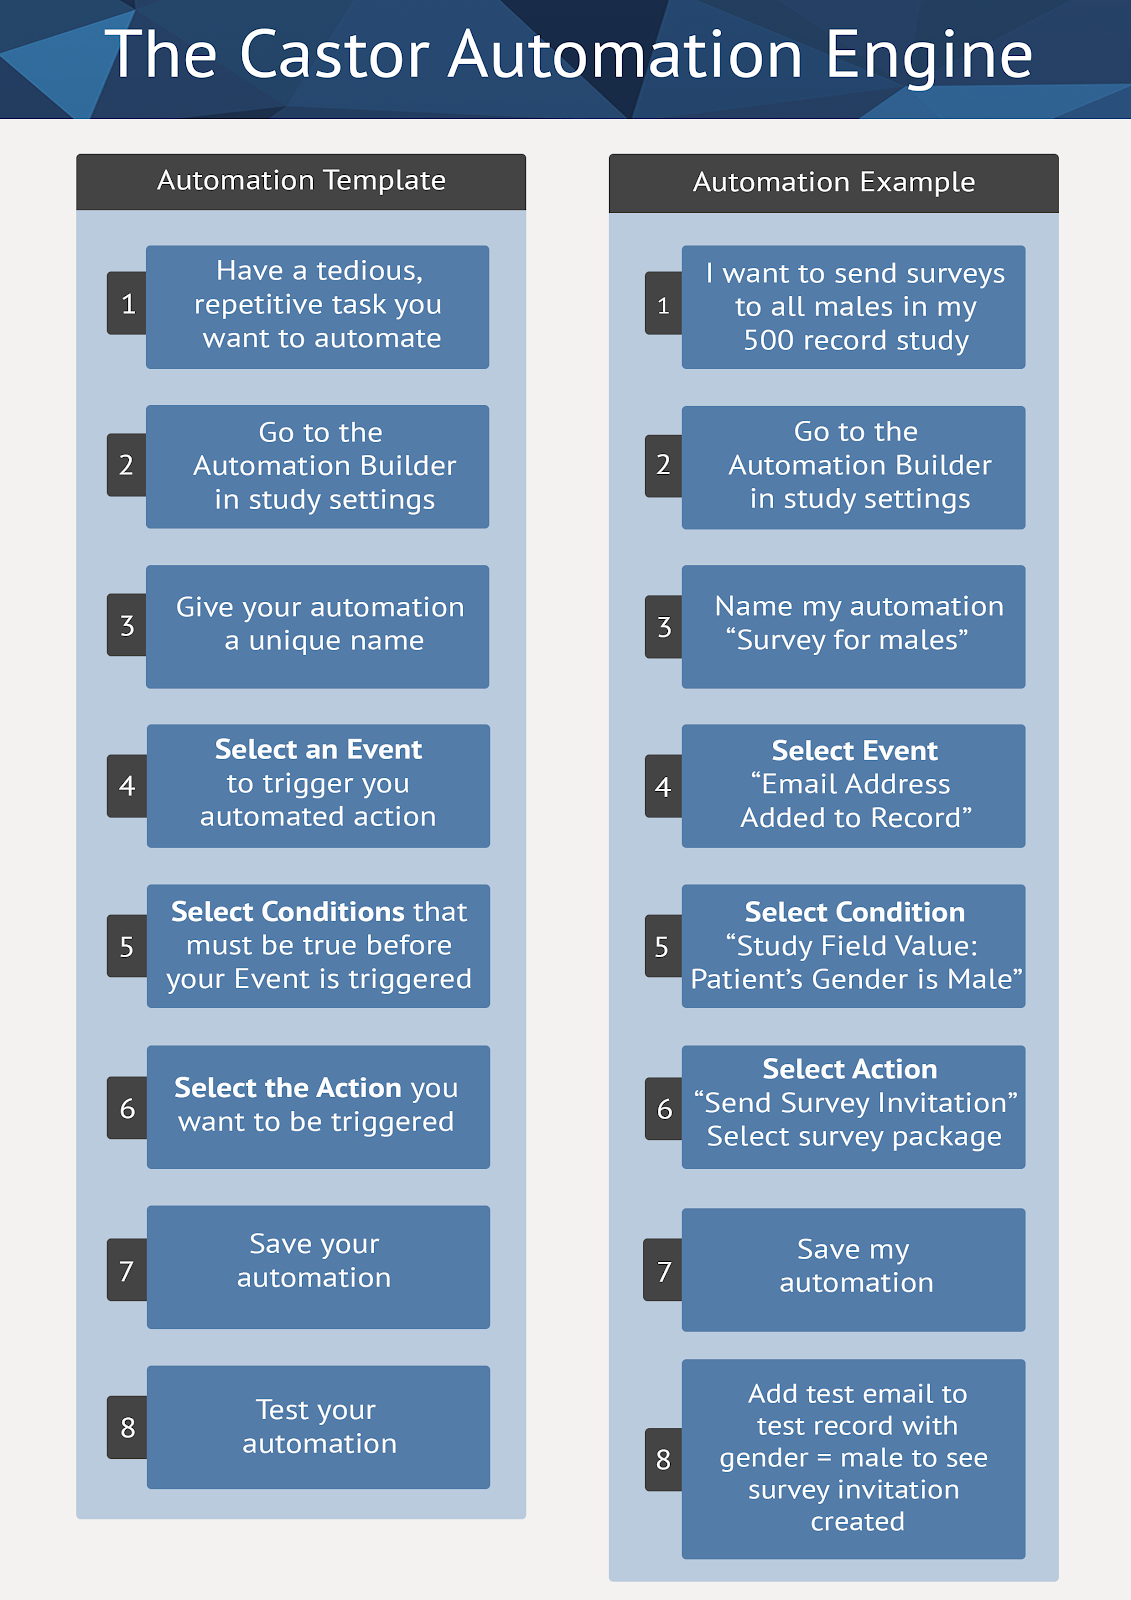
To use the Automation Engine, you need to build automations for your study. To do that, follow these simple steps:
- Enter the Automation Engine interface and create your automation.
- Give your automation a unique title so as to easily identify it later on.
- Select an Event that will trigger your automation.
- Add condition(s) that must be true when the Event occurs. When the Event occurs, the resulting Action will only trigger if all of the conditions are met.
- Select the Action you want to be triggered.
- Save your automation using the save button in the Automation Engine user interface.
- Test your automation by monitoring it's behavior in test participants. If you want to double check if your automation was triggered, check the Automation Engine Logger in the Settings tab
- Not happy with your automation? Try editing it.
Note: Currently, an automation will only be triggered ONE TIME PER PARTICIPANT ID. If a participant is deleted or archived and the participant ID is used for a new participant, the automation will NOT be triggered again.
Applicable to studies which they have enabled the feature to reuse participant IDs
The Castor Automation Engine Template
In the image below, the individual steps are outlined to the left and a 'real-life' example is given to the right.
