Automatically hide and show visit/form based on the Site
Table of Contents
This guide will help you with creating an automation to show/hide visits/forms based on the Site.
Before you start
In order to be able to access the Automation Engine, you should first enable Automation Engine in your Settings tab. Go to the 'Study' tab and 'other' sub-tab . For the field 'Enable Automation Engine', select the checkbox and click 'Save'. After refreshing the page, the 'Automations' sub-tab will appear under the 'Study' tab.
Hide form works very similarly to hide visit, so this case can be used as an example for hide visit as well (simply just change the hide form action to hide visit).
It is important to know that hiding visits or forms is possible in study and repeating data forms, but not in surveys.
Create Automation to hide visits/forms
1. First create (or move*) the questions that you want to be answered according to the site to separate forms.

*If the questions already exist but they are all in the same form, you can move them to their ‘new form’ going to “Forms” > “Study” > select the visit and form they are currently in > click on the ‘cross arrows’ icon:

Then move them to their destination form using the dropdown.

2. Once you have placed the questions on separate forms, it is time to add the calculation field that will automatically identify from which Site is the user when they are completing the study data.
We recommend adding the calculation field on the first form of the first visit of the study because the system will only be able to use the calculation to identify the Site when the user opens the forms that it is in. Therefore, the system will only hide the forms for the user from other Sites once the calculation field is triggered, otherwise they will keep visible.
When creating the calculation field, you will need to write on the “Calculation template” exactly “{castorInstituteName}” as shown in the example below. This formula is the trigger to identify the user Site.
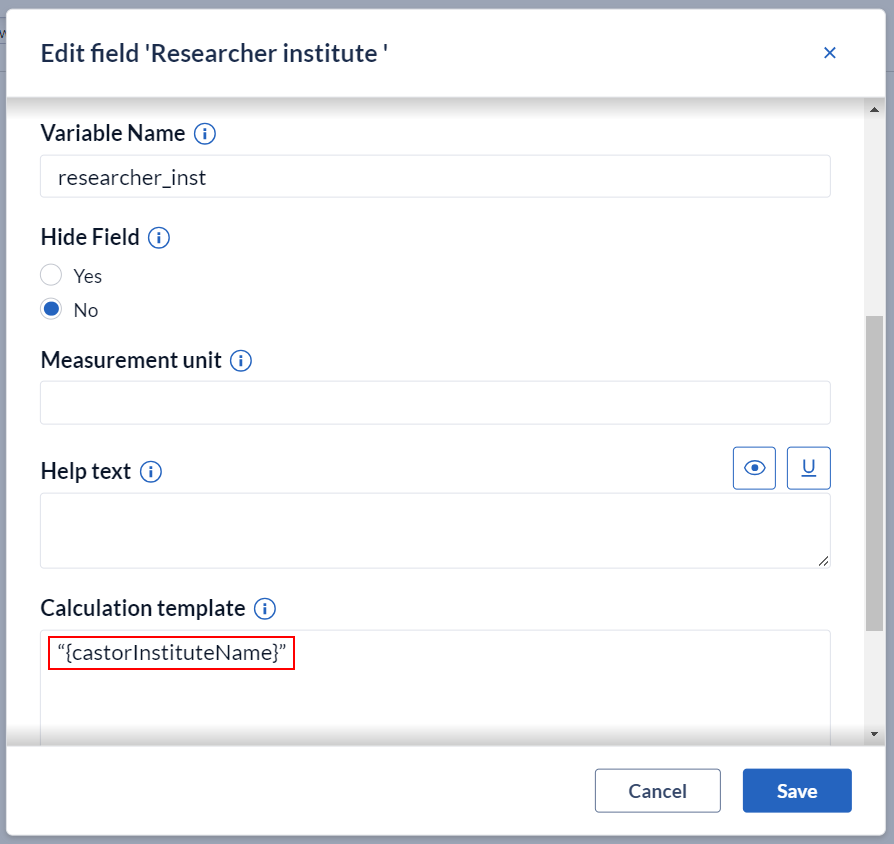
As you can see, we created the calculation field on the first visit and form of the study and placed it at the top.

3. Go to “Settings”, on the left side menu and then > “Automation” > Add automation.
4. Set the automation to “Study field value updated” > select the ‘Calculation field’. For this example, we named the calculation field “Researcher institute”.
.png)
5. When defining a condition, select “Participant Site”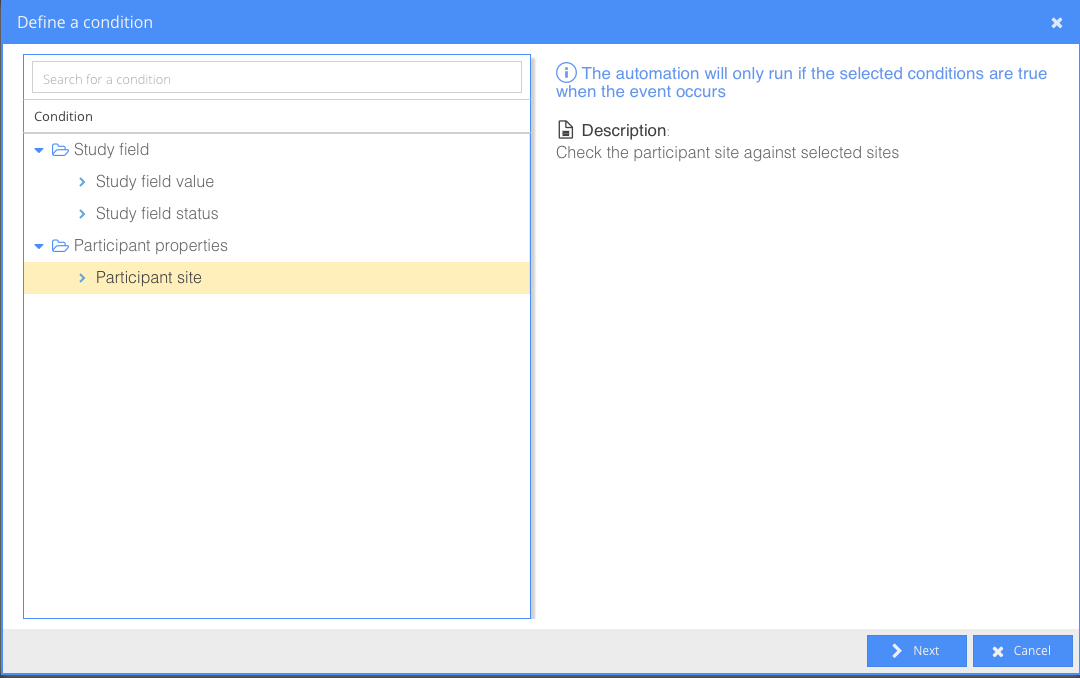
6. Then select one of the sites and save.
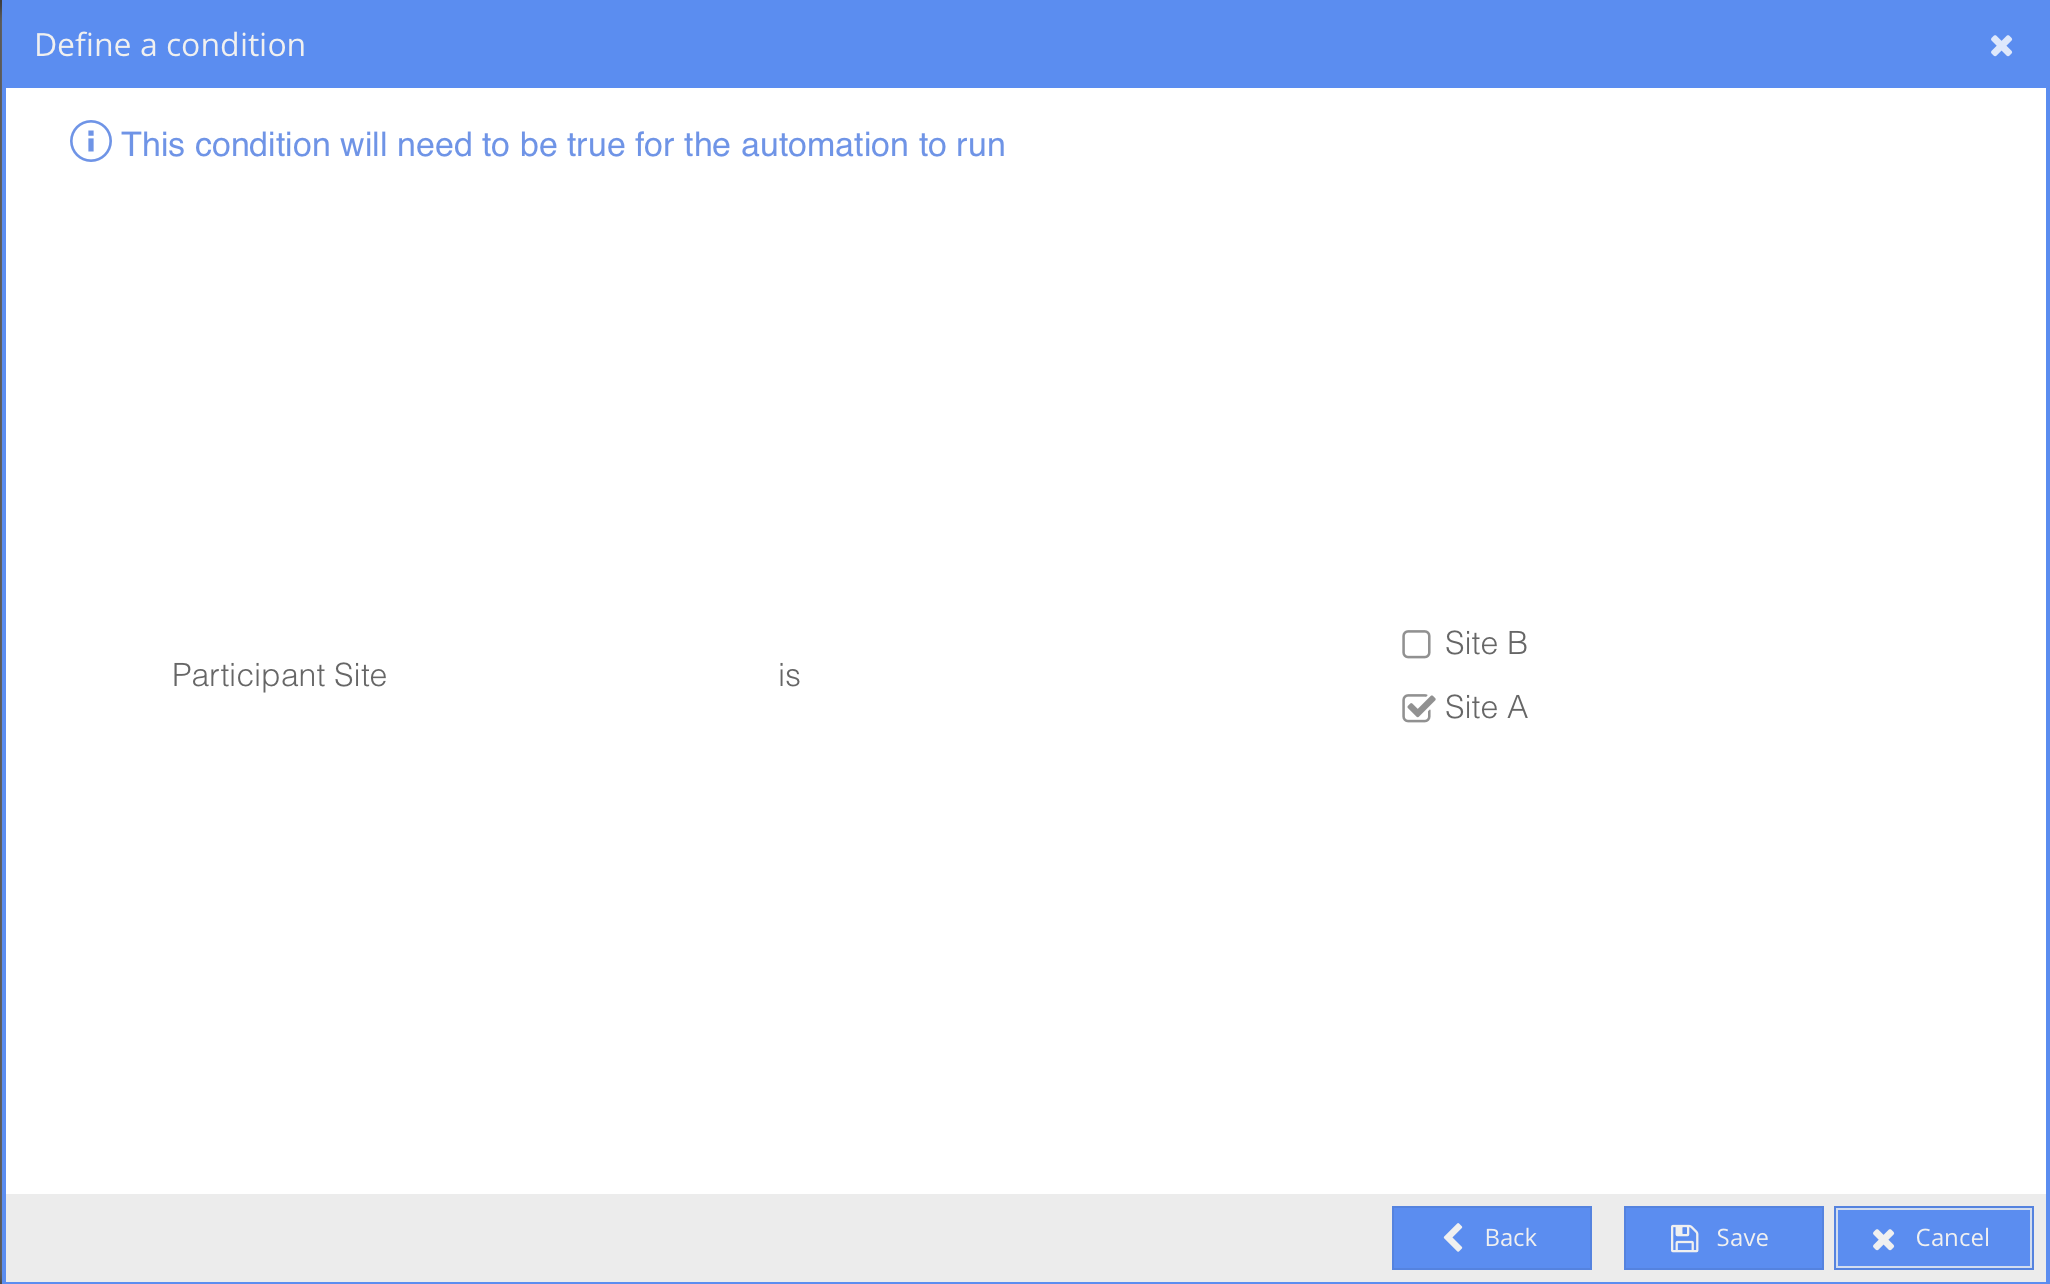
7. Go to “Action to be triggered”. On “Select action” choose the option “Show/hide form”.
8. Select the form you want to hide from the site you selected on the previous form: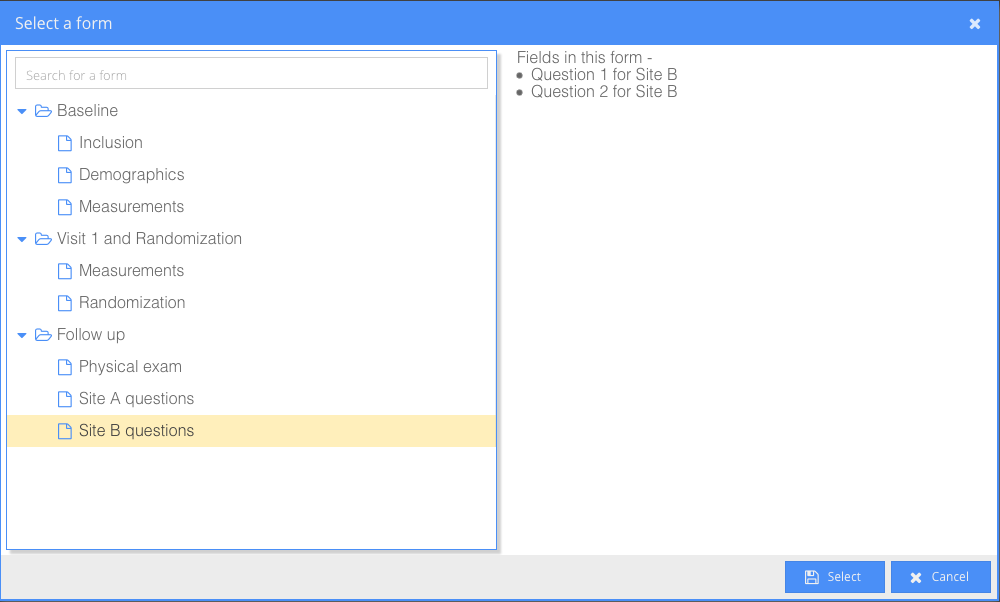
9. Click on “Select” and then, save your automation.
10. Repeat this task to each one of the different sites.
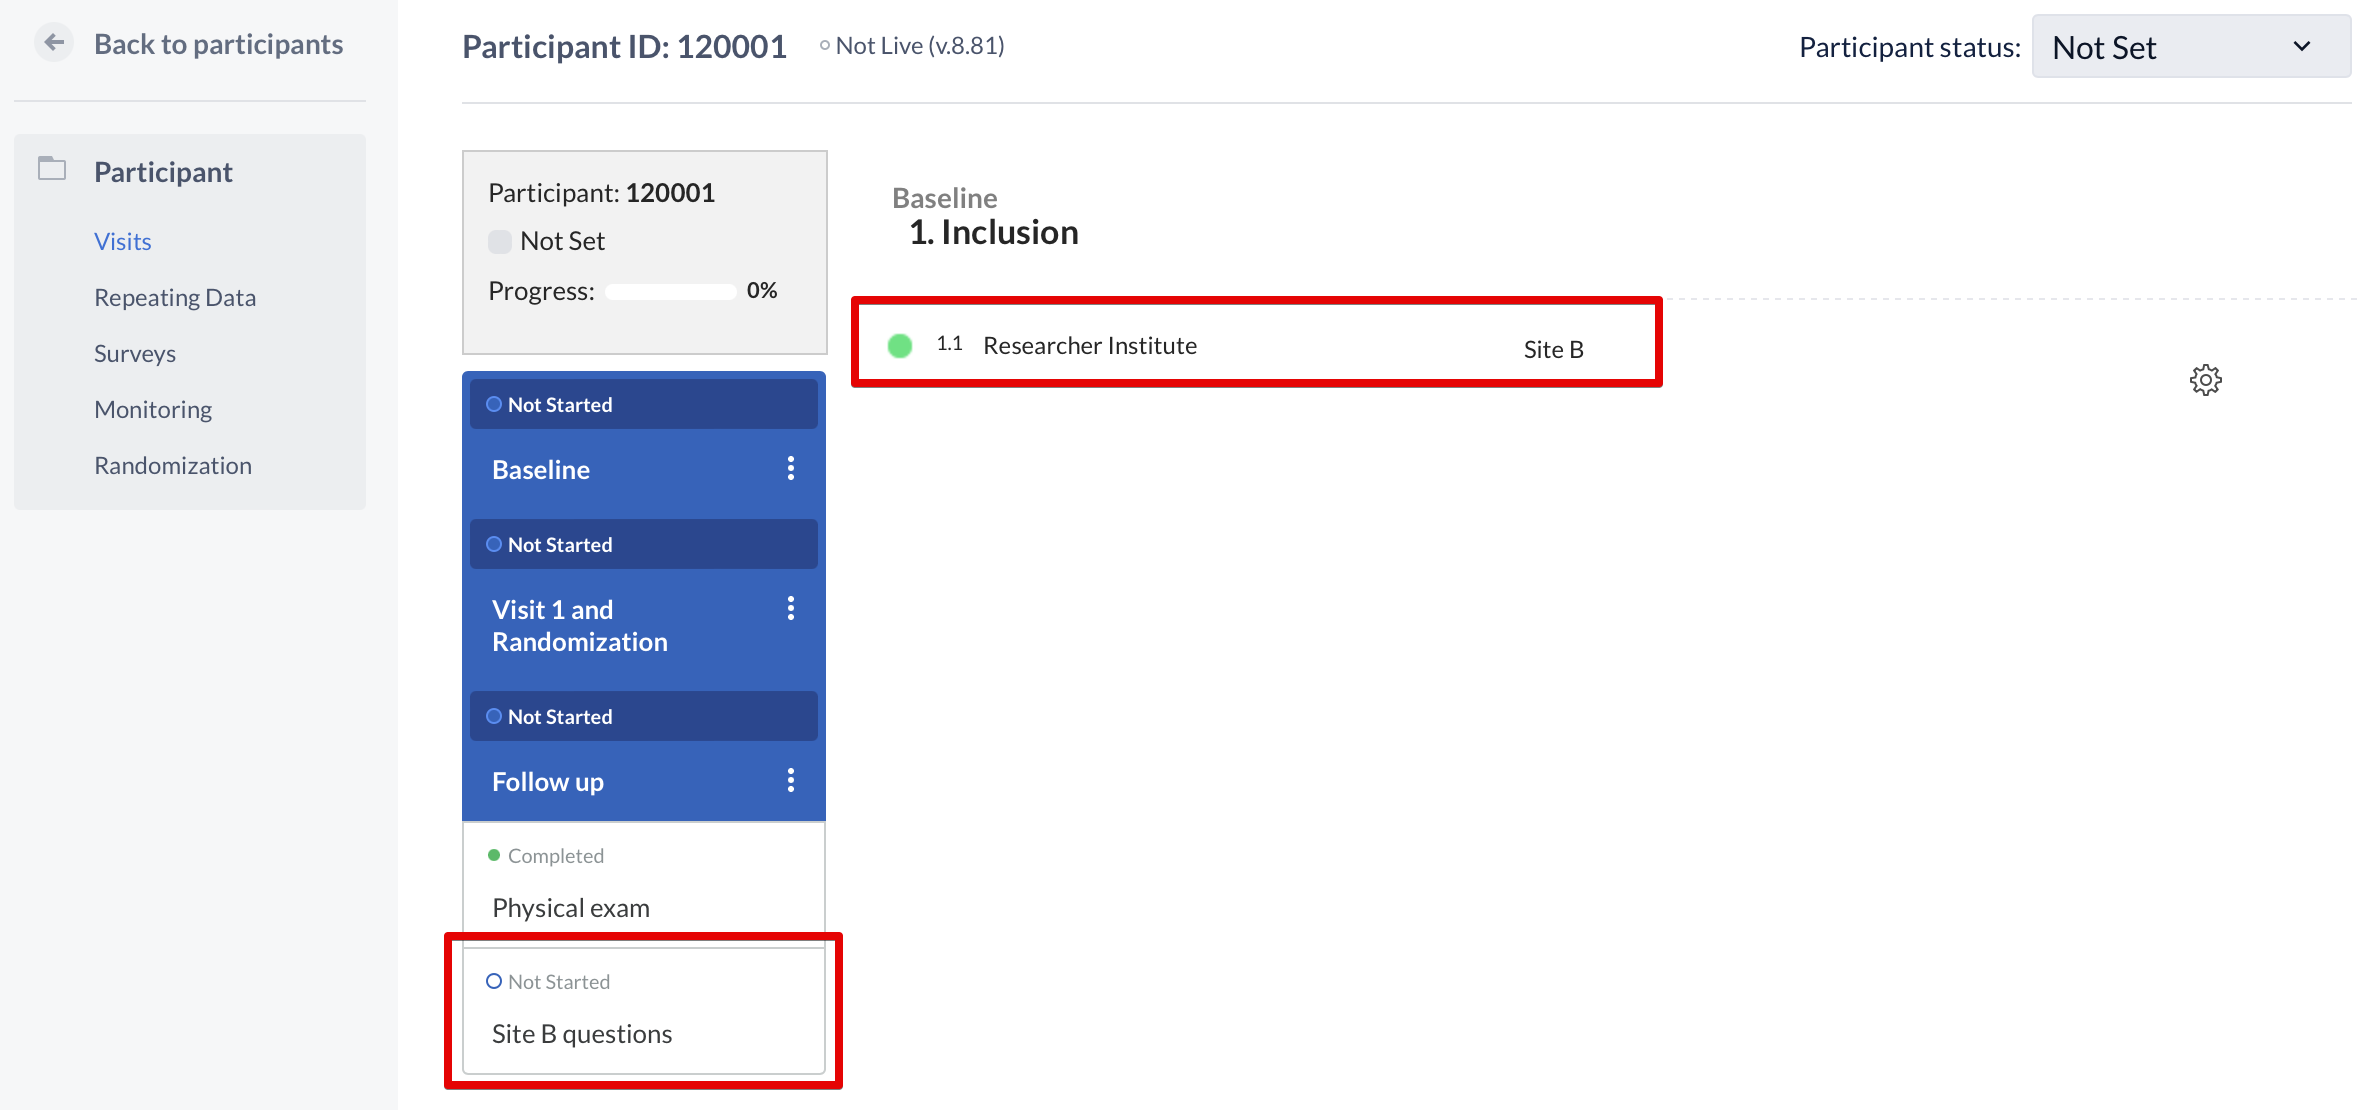
11. Once you finish, your automation should be ready as the example below. Only Site B questions are visible, form with the Site A questions is hidden:
